Vertiefungsarbeit – Nicola Graf & Martin Roesch
PREMISE
Possibilities of clay printing in architectural design ?
3D printing has taken on a central role in architectural design and model making in recent years. The technology offers a range of new applications to speed up the design process and has therefore been embraced by first year to master students at D-ARCH.
Through intensive practice and teaching, we encountered a recurring problem which often limits the use of 3D printed objects.
Altough PLA printed objects quickly produce a useful representation of volumes they lack representational qualities concerning haptics, materiality and atmosphere. Plus, the lack of recyclability poses questions regarding sustainability. Therefore we need to expand the range of possibilites in 3D printing with new expressive and recyclable materials.
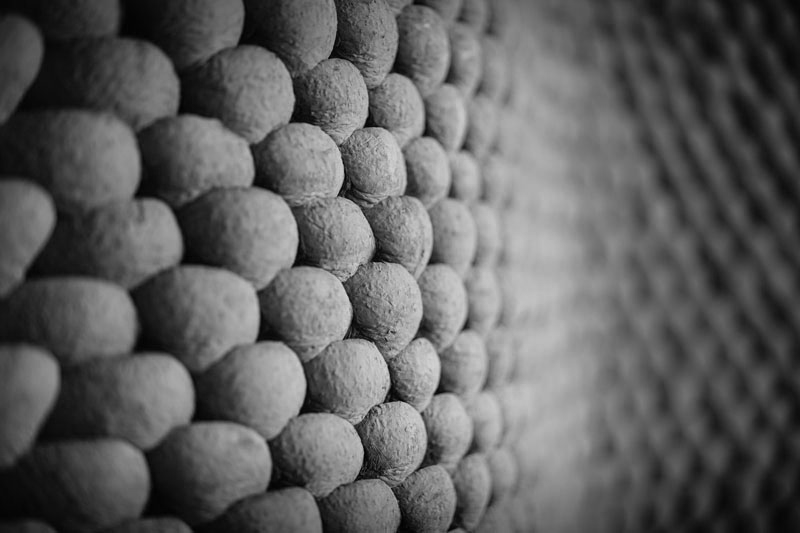
The material clay seems to be particulary suitable for this purpose, since prototypes of printers are already on the market, although they are not yet being used in architecture. Clay is close to traditional building materials and can be re-used. Our goal is to test clay in 3D printing for architectural representation. We want to produce models in different scales, from the facade to the situation model. Furthermore, we want to experiment with different clay compositions to test them on their visual, haptic and constructive capabilities. In order to achieve this, we assembled a 3D printer made for clay.
CLAY
Proprieties
Clay is a composition of finely grained clay minerals which develop plasticity when wet but become hard and brittle when dry. To remove the remaining water and further harden the clay it can be burned. This irreversibly transforms the clay mineral to a different molecular type: ceramic. It becomes hard and corrosion-resistant.
The main group of clay minerals include Kaolinite, Chlorite, Smectite and Illite. Depending on the composition of clay minerals and other constituents the clay can greatly differ in swelling, shrinking, plasticity, colour, and burning temperature.
Clay in 3D Printing
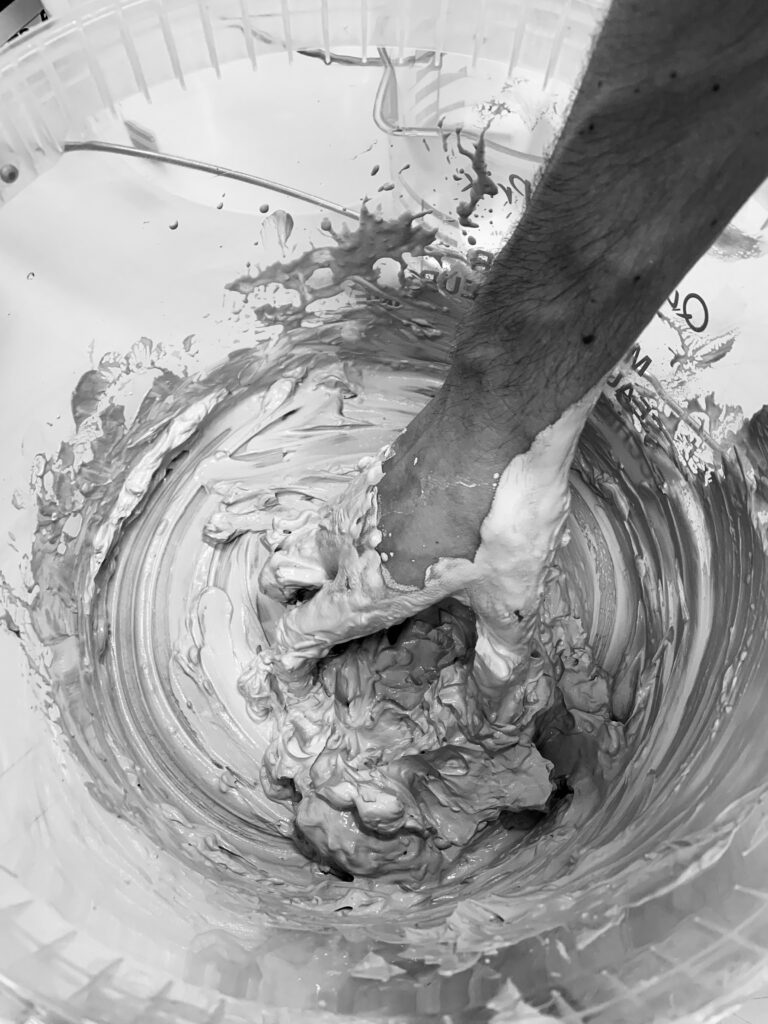
The most fundamental and important parameter in clay 3D printing is the water content. There are somepaths to explore for its reduction. Researchers at the D-BAUG ETH Zurich are exploring to add salt to increase the fluidity without water, which leads to less shrinkage but renders the possibility to burn impossible.
Another possibility is decreasing water contents when mixing and optimising the 3D printer, so that it can work with less wet clay by strengthening the motors. The water could be exchanged with another fluid (e.g. alcohol) to decrease drying time, so that the material would be already more stable when printing.
Future Optimisation
Clay can be combined with different water quantities. With minimum water content clay is just wet enough to be moulded (the plastic limit), up until maximum water content where the moulded clay is still dry enough the keep its shape (the liquid limit).
The clay for 3D printing needs to be wet enough to be pushed through the tube into the extruder and as dry as possible so it keeps its form even when thin or high prints are being produced. By reducing the water proportion problems with shrinkage and cracks when drying can be minimised.
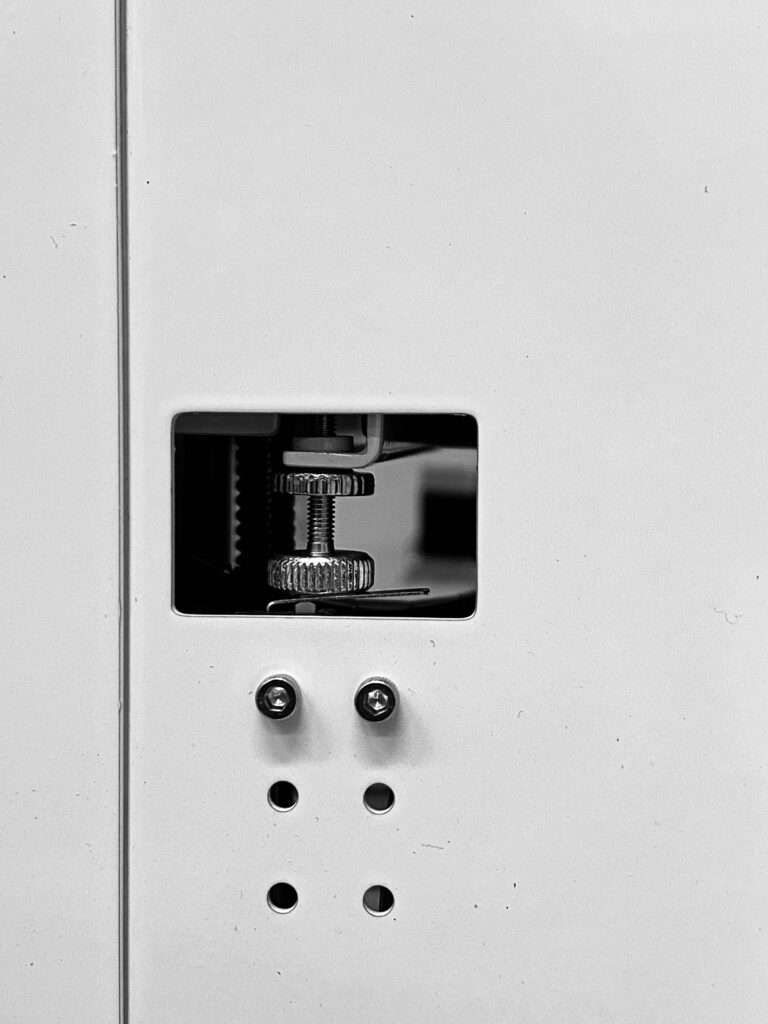
THE PRINTER
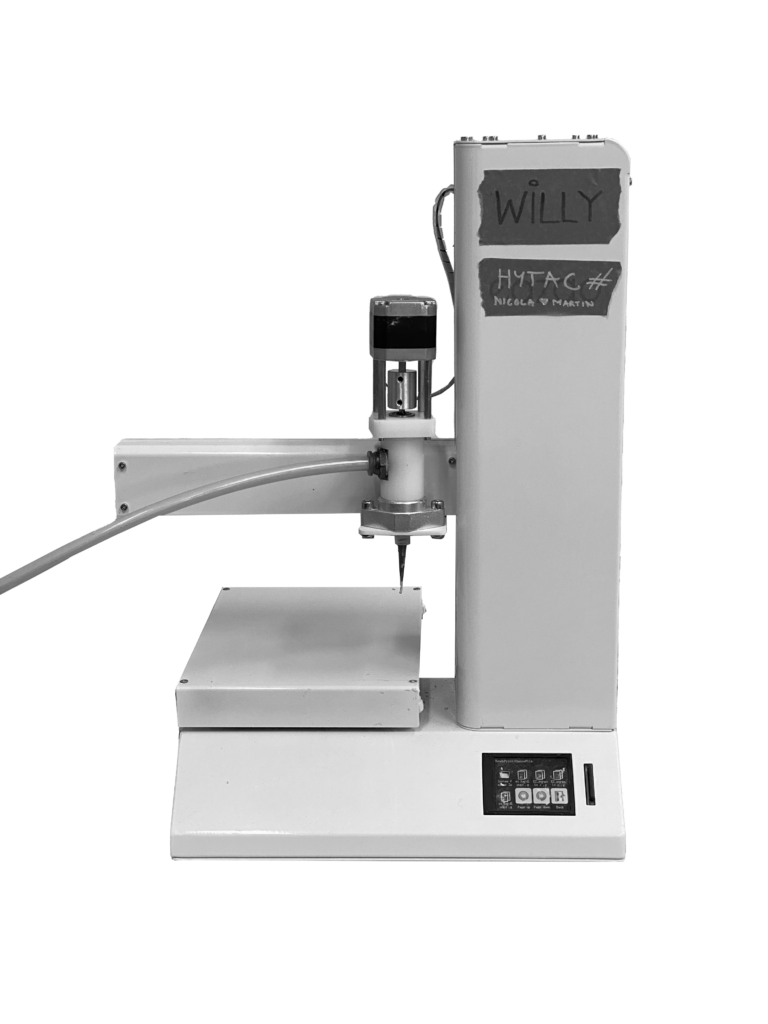
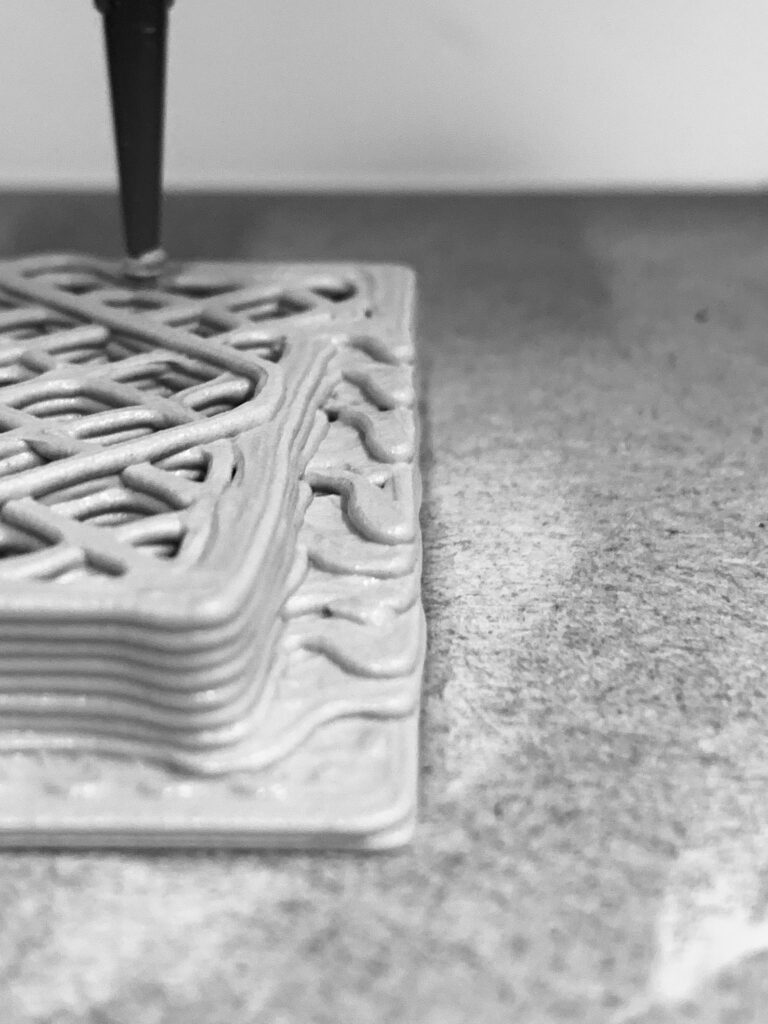
The Eazao Zero printer is a machine manufactured by the Chinese manufacturer Eazao. It comes with one type of nozzle and an electric putter which pushes the clay through the tube into the extruder. The g-code is read by the printer through a conventional SD card.
A core challenge with the printer is to get the clay mixture just right, that the motor is strong enough to push the material through the tube, yet it can’t be too liquid otherwise it will not keep form when extruded. The building plate is a 17x17cm MDF board. Since removing the wet model is impossible without damaging it, we chose to produce many boards to allow for multiple prints drying simultaniously.
The printer could be further optimised by adding a stronger motor (allowing for less moist clay) or testing nozzles with different sizes. The boards soak up water which accounts for un-even drying, different materials could solve the issue.
We named our printer Willy, because he is always willing to work.
REFERENCES
At the beginning of our research, we reached out to many experienced academics working in the field of clay or 3D printing. Their expertise and tips were extremely valuable to our work and process. There are also three selected works, which inspired us to work with clay.
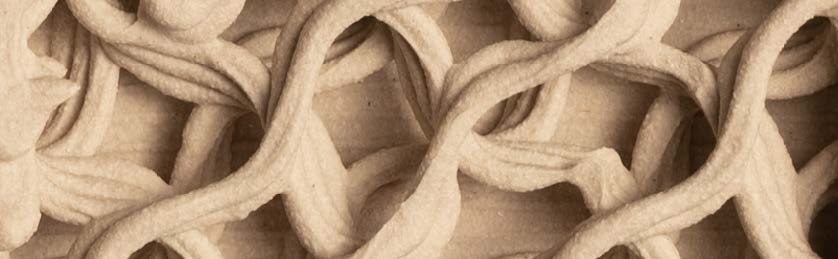
PRINT QUALITY
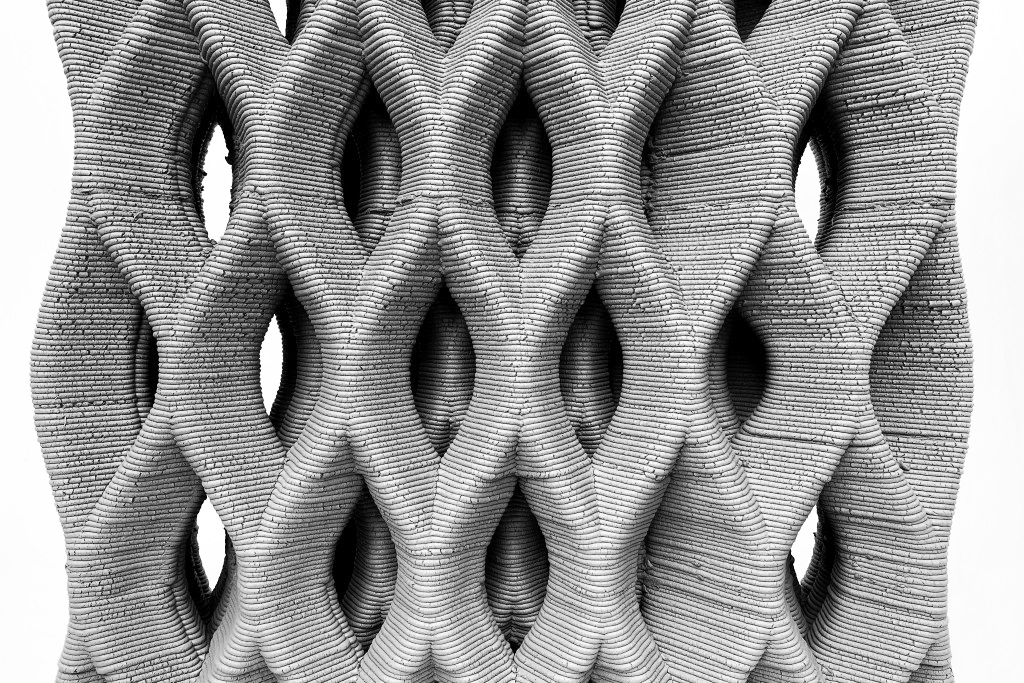
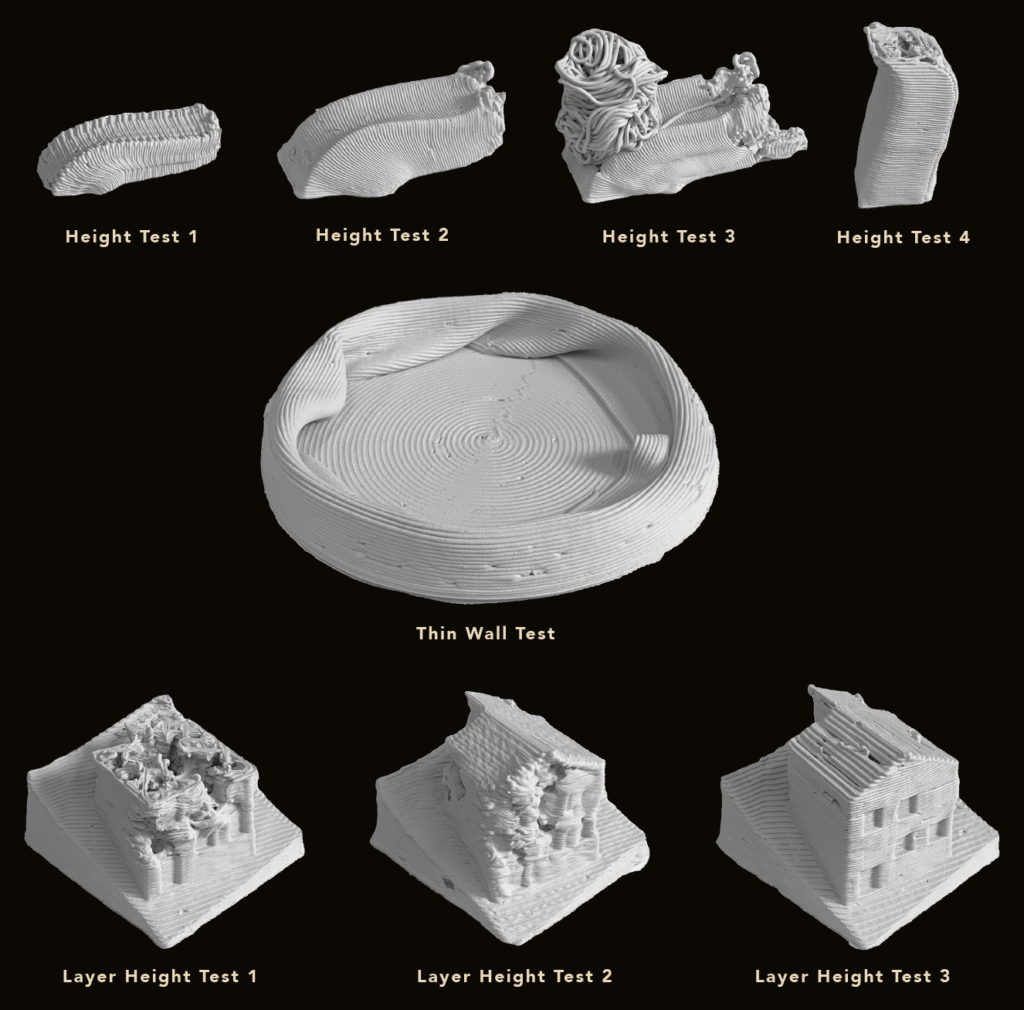
Our first goal was to test the different use cases of the clay printer. Can it be used to print models of walls, facades, context models? What type of infill is the most reliable while using the least material? Can there be overhangs or cantilevers?
We experimented with different layer heights, flows, and forms. By printing the same model over and over and only changing one parameter at once we were able to clearly understand what factors we need to adjust to get our desired outcome.
Our tests showed that it was impossible to print high and thin, as the model will just collapse under its own weight. Bridging is almost impossible, whereas overhangs can be done as seen in the context model. Surfaces can be printed, when enough infill is added to support the structure.
POST PROCESSING
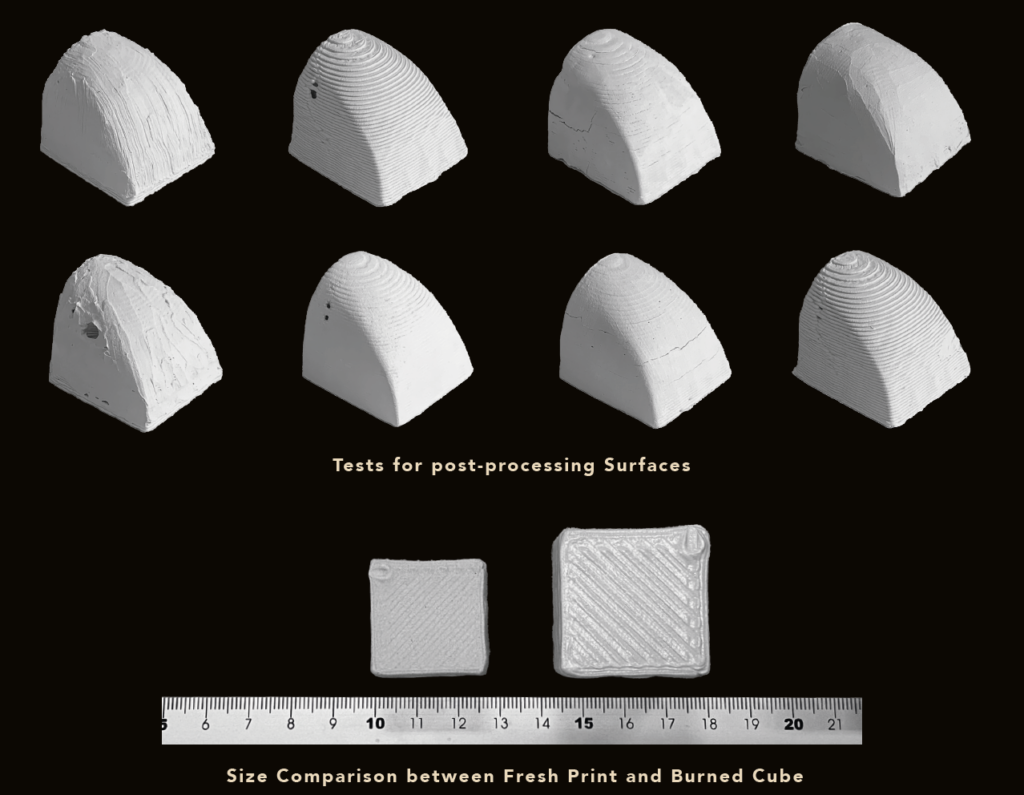
When the print is finished, the model is still moist and plastic. This is the first phase where it can be further processed. The surface can be smoothed with a sponge, by hand or with a sandpaper. During this phase it is also possible to add or remove clay or alter the model with a sculpting knife. These interventions need to be taken with great care, because in the following drying process slight changes in water content will result in cracks.
The next phase of post-processing is after the model has fully dried. In our experience this takes from three to seven days depending on the size of the model. To prevent uneven drying we built a structure wrapped with PE foil to decrease air flow around the model. This was only partly useful: It successfully decreased warp but increased drying time up to three weeks, which is not practical in the fast paced architectural design process.
After the model has fully dried you can smooth the surface with sandpaper or make changes with a sculpting knife. In this stage the model is brittle, which requires caution in order not to break it.
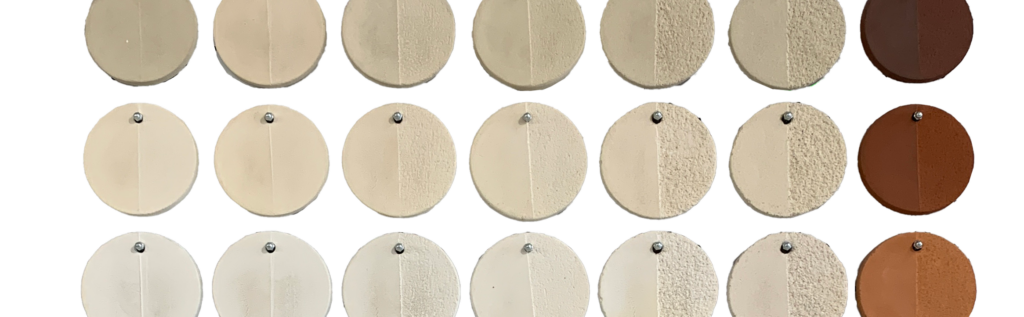
In a last step, you can burn the fully dried model. It loses its ability to be re-used by adding water and becomes stable. In this process, like in drying it shrinks around 10%, which needs to be taken into account when printing.
RE-USE
Can clay printing make the architectural model-making process more sustainable?
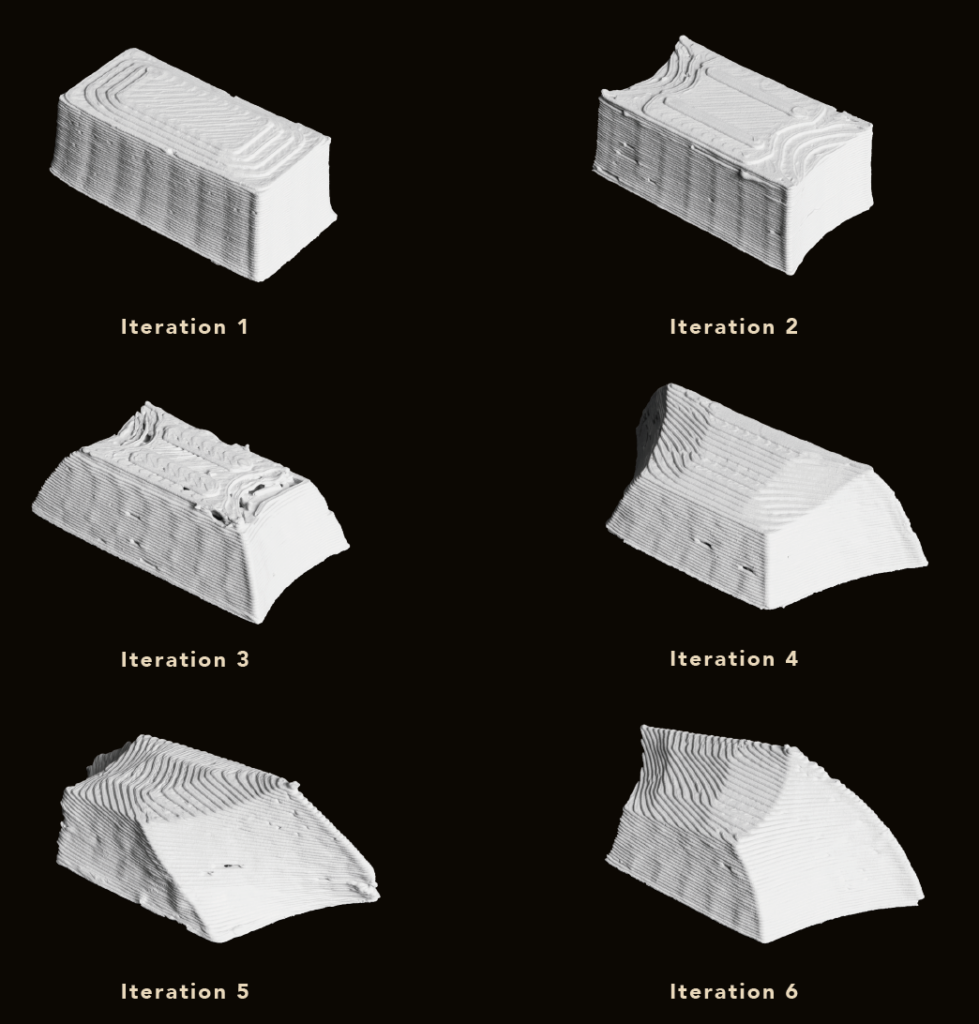
Clay is an earth-based material with the unique property that it can reversibly change its placticity depending on its water content. This opens the possiblity to use the same material repeatedly and avoids large amounts of waste everytime a change of concept requires a new model.
We tried to proof this concept by creating iterations of a form with identical amount of material needed to print it. We used the same clay to print six variants of our initial block. After each print we let it dry for five days and then mashed it to create fine powder. By adding water again we could reach the desired placticity.
APPLICATION
Where do we see potential for clay 3D printing in architectural design?
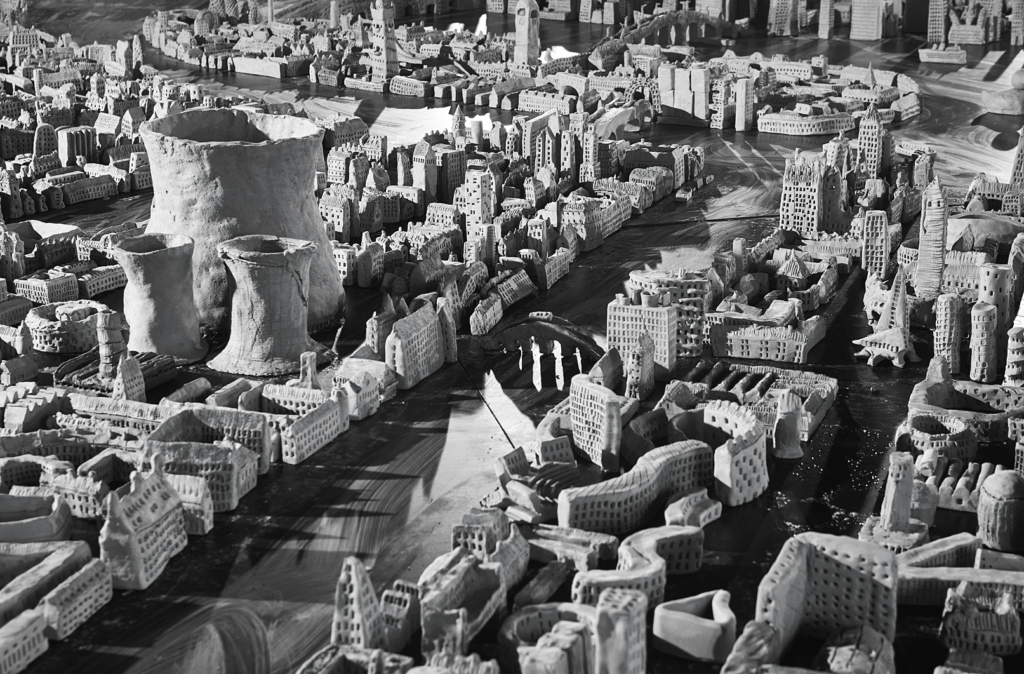
During our various tests and printing sessions, we came to the conclusion that this technique is best suited for context models. The inherent roughness of the print serves in this type of model as an atmospheric enhancement instead of being seen as an inaccuracy.
Models with a large volume can be printed in extremely high speeds, since the large nozzle allows for a high flow of material.
To print detailed models of buildings the material clay is limiting as thin structures or bridges tend to collapse quickly.
We also see great potential for hybrid modelling where certain well suited parts (i.e. facade types) are printed in clay and are completed with different materials.
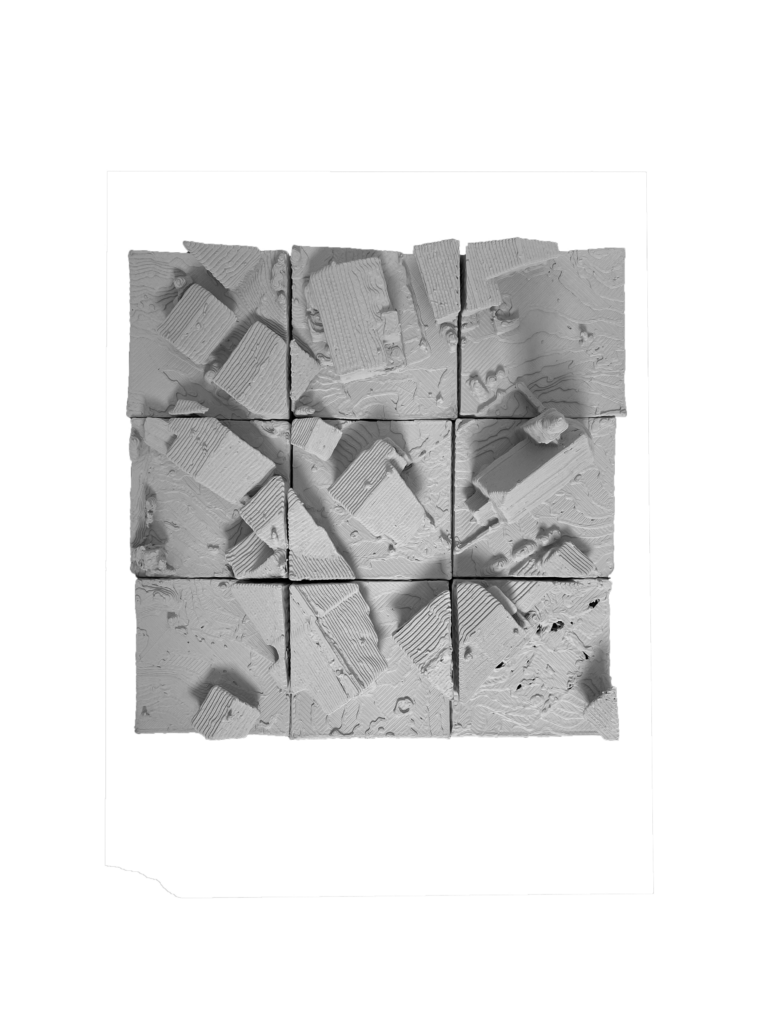
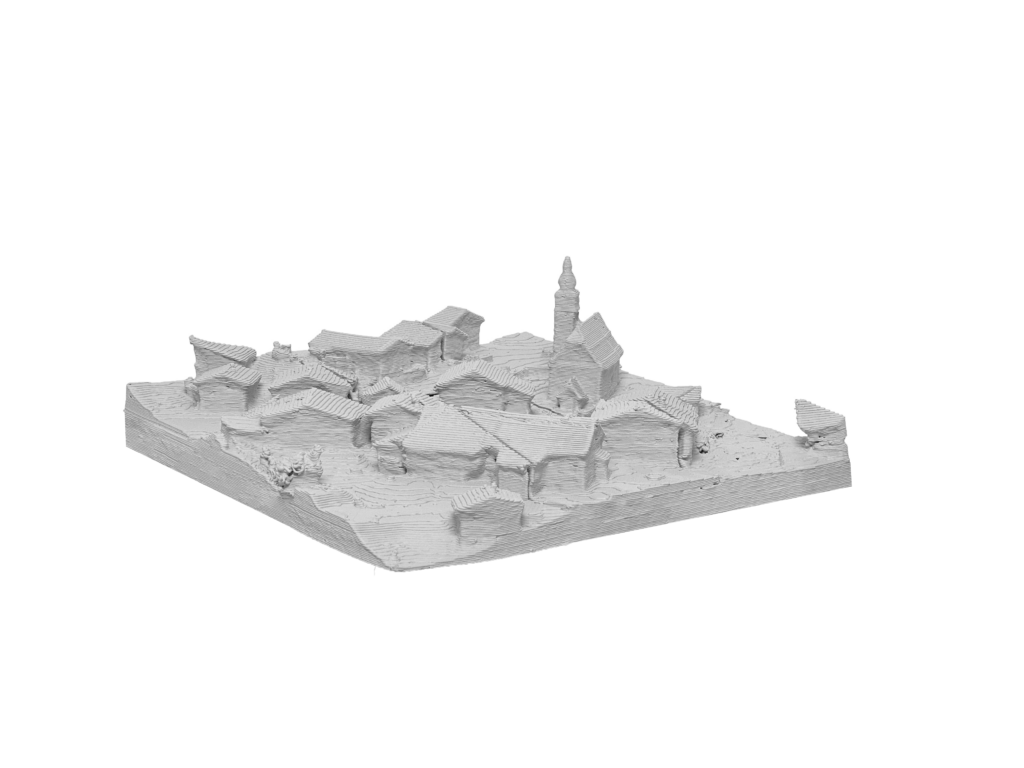
top view of context model
context model in nine parts, village Urmein, data from photogrammetry elective course
PROCESS
Our modus operandi was straightforward: We tried to find the limits of the machine and the material. Printing extremely thin walls, slim structures, very wet or dry clay, are some of the areas where we tested the material.
We also experimented with different printer settings such as various extrusion speeds, layer heights, volumes without infill or being completely filled in, and speed of printer movement. These prints often led us to clogged tubes or an unrecognisable pile of clay. Nonetheless, with every failed print we gained valuable knowledge on how to operate the printer correctly and how to use clay in 3D printing. Some of these tries we kept.
EPILOGUE
During our work and especially in the discussion with our supervisor or the various experts on their respective field, we often realised that clay 3D printing is a field which offers many avenues that could be explored. Some of the most promising we would like to bring up here, so that the work on 3d printing in architectural design can be further explored and refined.
Working with different types of clay and additives: We conciously made the decision to only work with one type of clay so to concentrate on printer settings and create comparable results. Yet, different clay could bring completely new aesthetic results, solve problems of shrinking, and allow for higher or thinner models.
Modifying the printer: We opted for a ready-made solution to immedeatly get results. Yet, in our discussion and by visiting other printer models we learned that we could exchange motor, tube and nozzle to push the limits of what the printer can do.
Programming the movement of the printer on our own: Since our focus lay on the material possibilities and aesthetic qualities we decided not to program our own g-code. Nontheless, this would open up new possibilities of controlling the printer, really working with the material and its limits. In this case, the printer would not only be there to represent architectural ideas, but its prints could become architectural elements on their own.
Copyright
Vertiefungsarbeit by Nicola Graf and Martin Roesch
Autumn Semester 2022
Supervised by Doz. Jonathan Benhamu
Chair of Architecture and Construction | Prof. Andrea Deplazes